Have you ever wanted an easy way to relocate a feature that was already created in SOLIDWORKS, without ever having to edit that feature’s sketch? That’s entirely possible through the use of Instant3D functionality!
SOLIDWORKS Instant3D is a great tool for quickly creating and modifying any kind of model geometry, as well as sketch entities within a part or assembly file. Changes can be made by simply using the handles and rulers that appear after clicking on the features and/or sketch entities and dragging to their desired locations. However, one thing to note is that this only works for features or entities that aren’t fully defined.
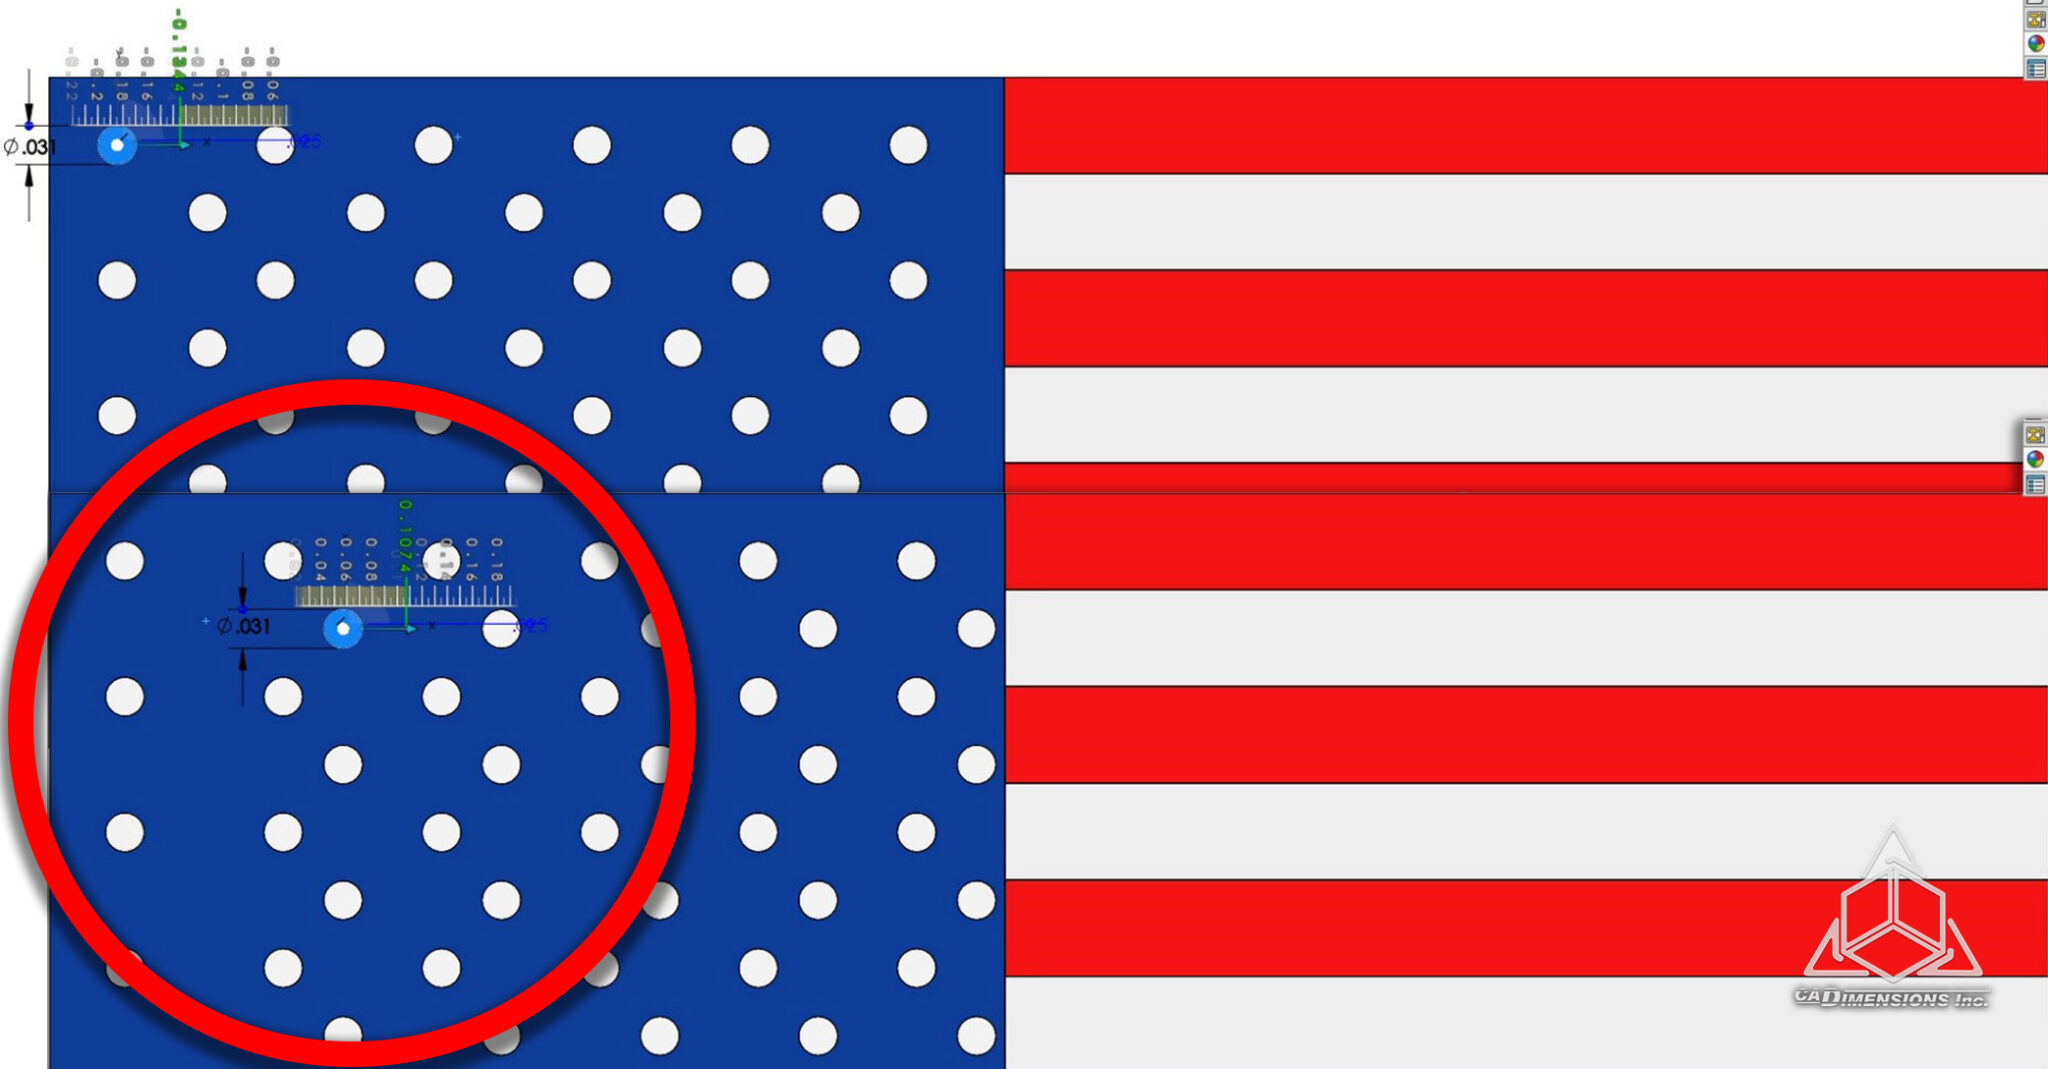
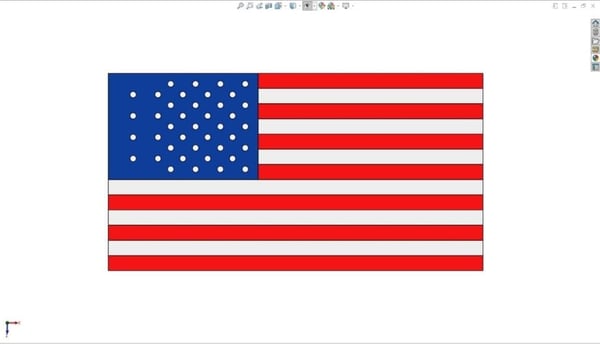
In this example, we’ll be working with an American flag that was modeled in SOLIDWORKS. Looking at the model, the “stars” seem to be a little off and it appears that the linear pattern may be out of alignment. Let’s go ahead and fix that by using Instant3D to move this pattern to its correct location!
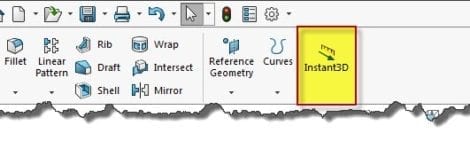
Step 1: Activate Button
To activate the Instant3D functionality, click the Features toolbar, and then select the Instant3D button to switch it on.
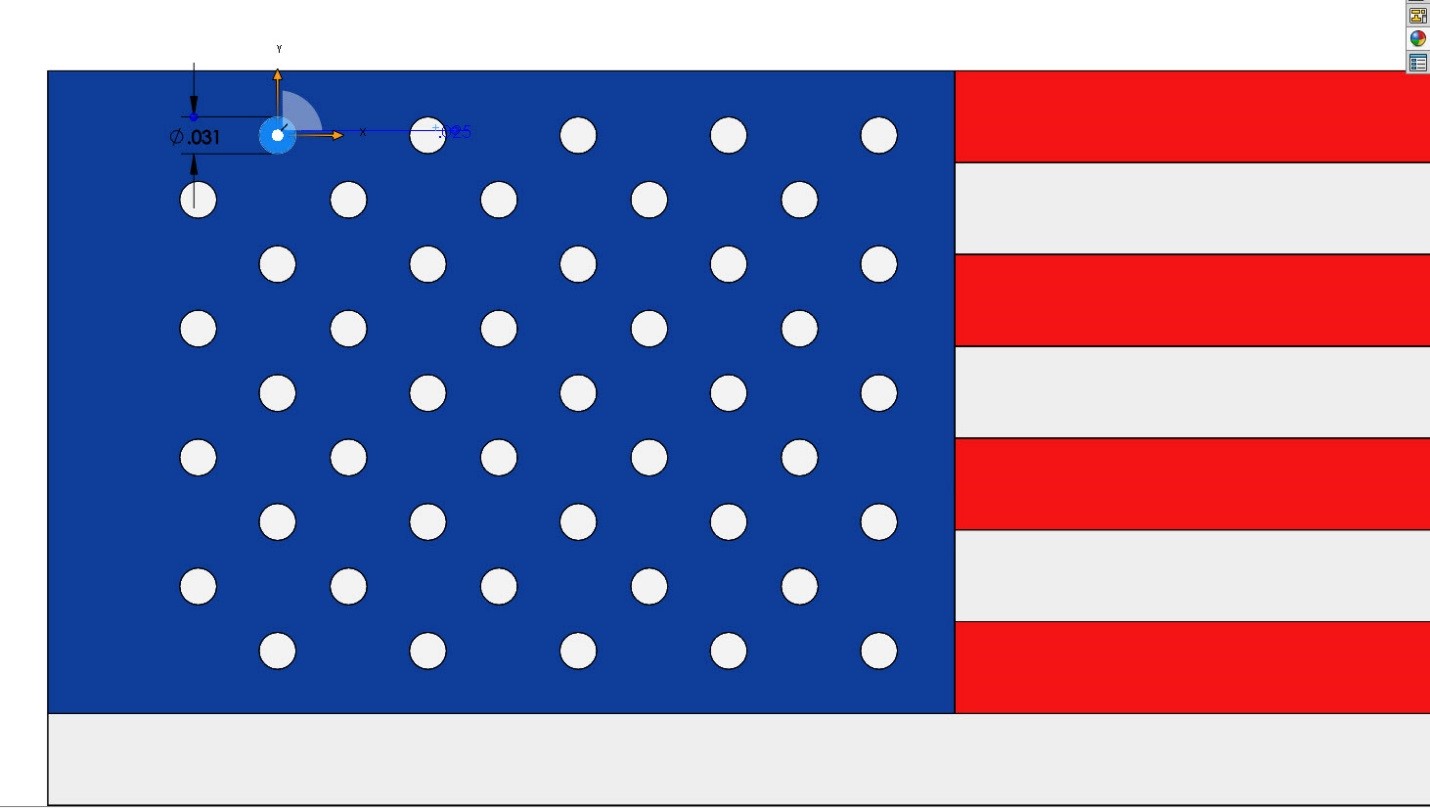
Step 2: Selecting the First Instance
Now with it activated, let’s select the first instance of the “star” linear pattern. Upon clicking the first instance, two arrows pointing in two different axes become visible. Just by simply clicking on one of the arrows and dragging along that axis, SOLIDWORKS will allow for the entire linear feature to move as one piece. Again, it’s important that the original seed instance isn’t fully defined in this case and therefore can easily be moved without having to break any links or relations.
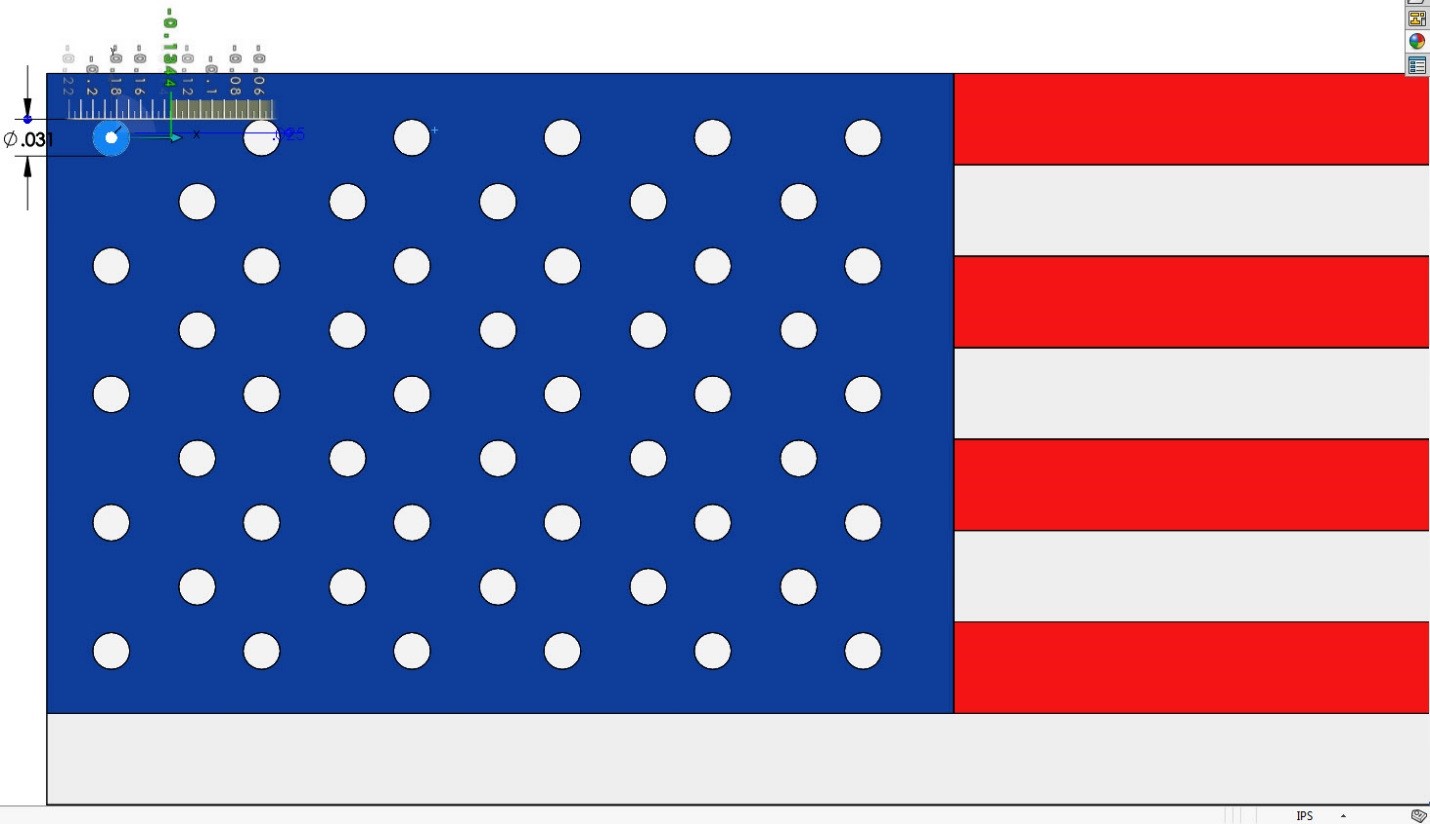
Step 3: Moving Multiple Features
Additionally, as the arrows are being dragged, a ruler with the specified distance that the features have been moved will help you visualize the location change. Multiple features can also be moved at the same time by holding the Control key on your keyboard, and then clicking and dragging the arrows.
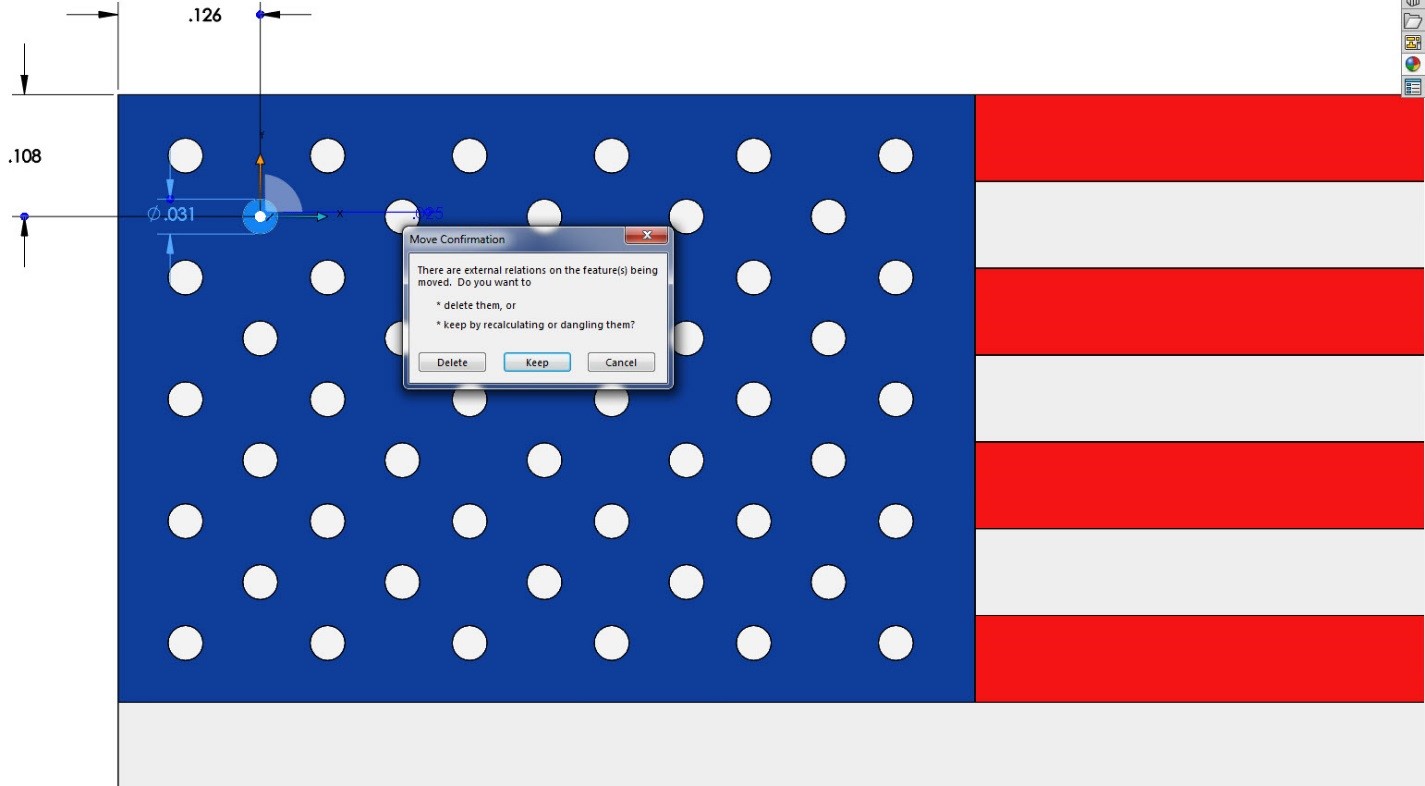
Step 4: Choosing the Second Linear Pattern
The second linear pattern for this part will be a little bit different than the first pattern. The second pattern is fully defined and its relations will need some attention. Upon clicking and dragging the handles for the second linear pattern, a new window will pop up in the SOLIDWORKS window. There are two choices to pick from. “Delete” will delete all of the relations associated with the feature, whereas “Keep” will either dangle the relations or recalculate them. (This can cause some warnings to show.)
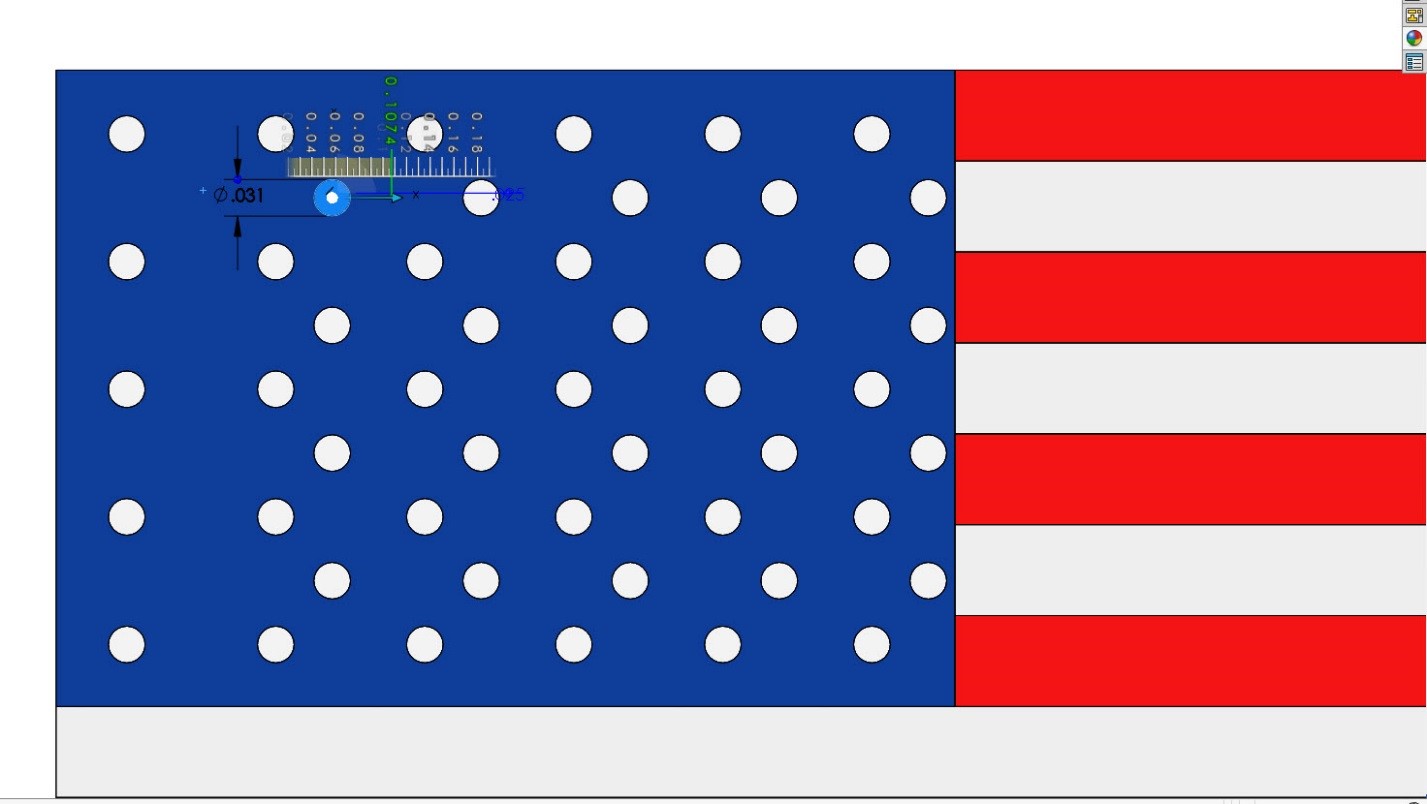
Step 5: Addressing Error Messages
By choosing “Delete” the features can now be moved to a new location without any warning or error messages being shown on screen.
Now you can seamlessly move features without having to edit or change its corresponding sketch!

Need Help With Your Design?