The reader should consider this a detailed approach to handling administrative changes. There are simpler solutions for the same functionality, but this article is focused on the key concepts.
Summary
Often engineering documents or drawings require a minor change. File updates generally don’t affect attributes such as fit, form, or function. If the document is in SOLIDWORKS PDM and it requires modification, then it is checked out. Changes made to the document are captured as a new version in PDM upon check-in. Unfortunately, the version after a revision may cause confusion and/or concern if not documented correctly or communicated.
Definitions
- Administrative loop - An engineering process that causes a design to leave a state identified as being released for manufacturing. All drawing and/or documentation updates are considered to not affect form, fit, or function. These types of changes are typically for typos, incorrect supporting data, and/or invalid watermark annotations.
- Form - The design characteristics that define things like material, color, weight, shape, etc.
- Fit - The dimensions of the drawing or model that determine what the product is designed to go into.
- Function - The purpose of the intended product design.
Normal Released Version
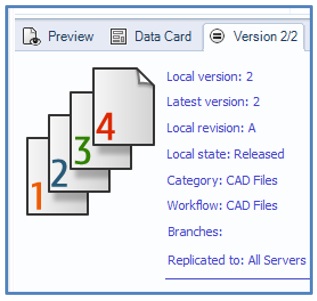
File is in an “Approved” or “Released” state and a revision has been assigned. See figure below.
Abnormal Released Version
Question: What happens if the file is checked out and a minor change is made to the file, such as changing a data card value?
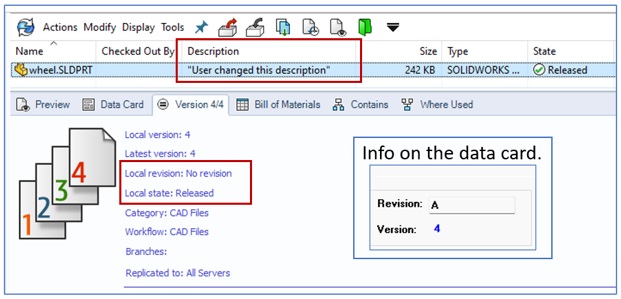
Answer: When the file is checked into the vault again with the changes, a new version is created, and local revision will appear as “No Revision”.
Notice in the figure below the “Revision” variable on the data card still shows “A” but the local revision will appear with “No Revision”. The file was checked into the vault with a data card update causing a new version.
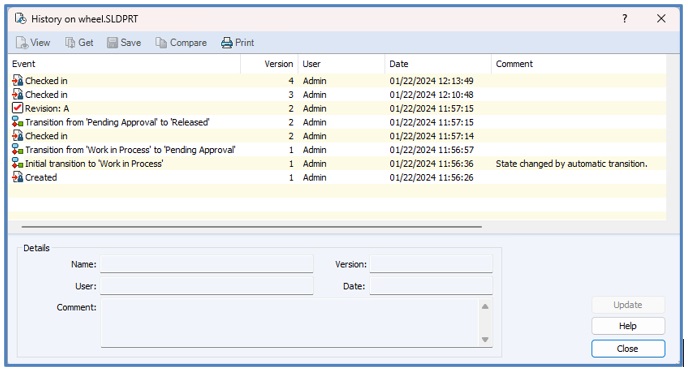
One might think this isn’t a big deal because the variable is still “stamped” as “A”. Only the file history and the version tab cause questions because there is a version(s) after a revision. See figure below for file history. Notice there are no comments for versions 3 and 4. Lack of proper documentation leads to confusion and misunderstanding.
Undoubtedly this is critical if using the Convert Task functionality in SOLIDWORKS PDM. For example, the company needs a new version of a PDF file created after the change is made and while in the “Approved” or “Released” state. The output file path for the convert task must contain a file name that includes the current revision value of the source file.
Example output file path format:
<File Path>\<Source File Name>‐<Source File Revision>.<Extension>
The “Source File Revision” component would be empty after making the minor file changes.
Workaround
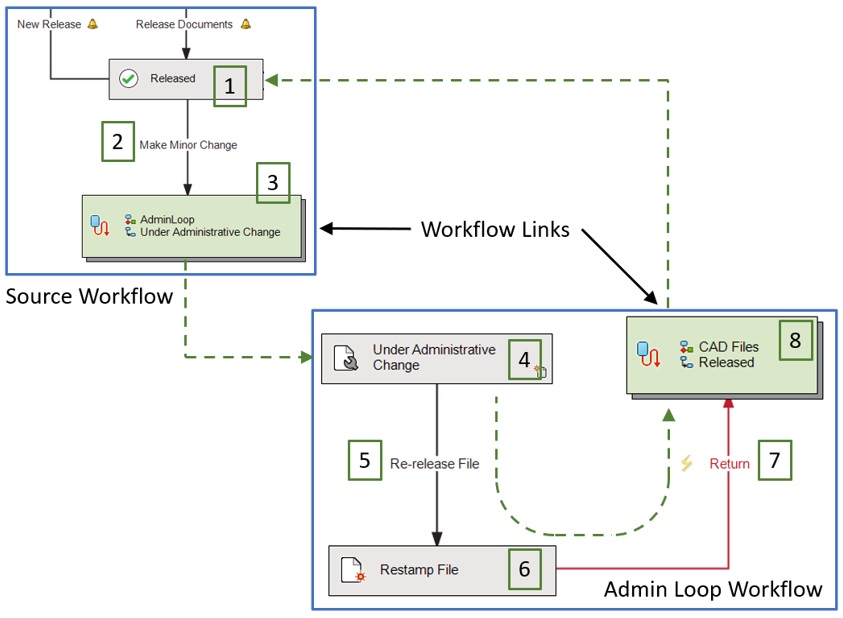
Create a simple administrative loop like the one shown in the figure below. The green dashed line represents the flow pattern.
Setup
Refer to numbered items in figure above.
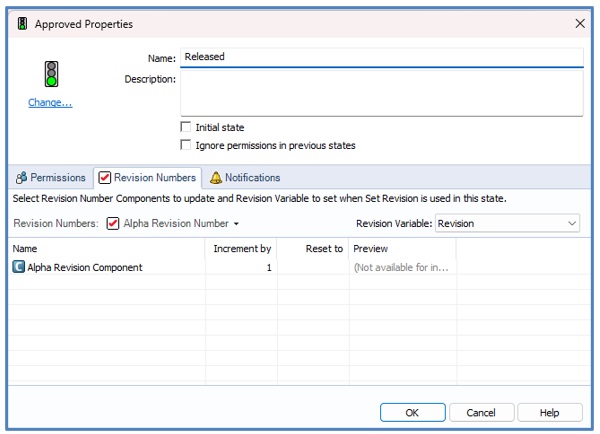
- Released state - No changes here. Look at the figure below for a typical setup. Permissions would be set to “read-only” for all users.
- Make Minor Change transition - Workflow transition with no expected actions.
- Workflow link - Workflow link enables transition from one workflow to another. Workflow links are strongly recommended for modularizing and simplifying process structure. Subsequently creating a separate workflow for administration changes reinforces the suggestion.
- Under Administrative Change state – Assign permissions to user(s) who can see the files and check out/lock them. Checking out a file enables the user to make a file change. Particularly the changes generally don’t affect fit, form, and/or function. Checking in files with changes into PDM will cause a new version to be created after the revision.
- Re-release File transition – This is an important transition functionally. Add two actions to the transition.
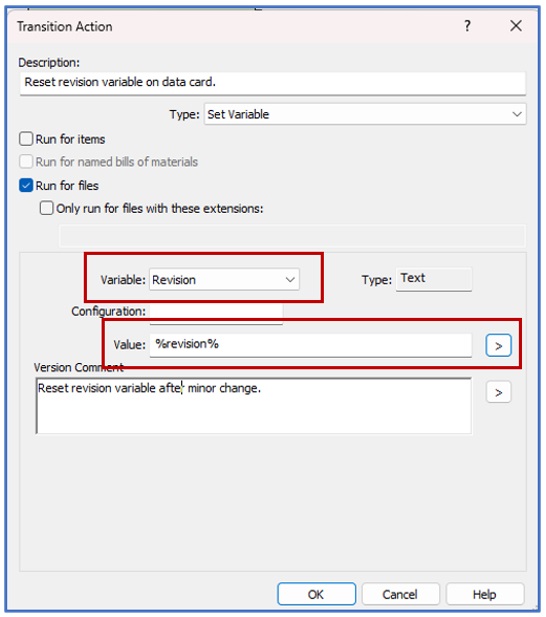
The first transition action is “Set Variable”. The purpose of this is to refresh the revision value on the data card. The key here is to set the value to “%revision%” and NOT “%next revision%”. This is one of the few times where “%revision%” system value is used.
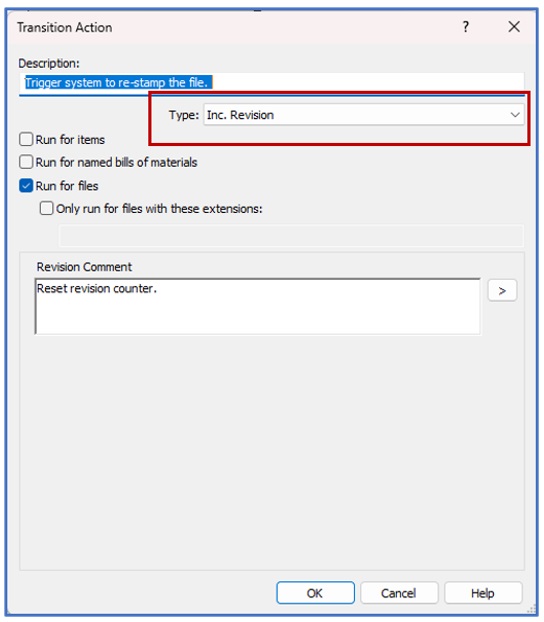
Secondly, add an action item for incrementing the revision.
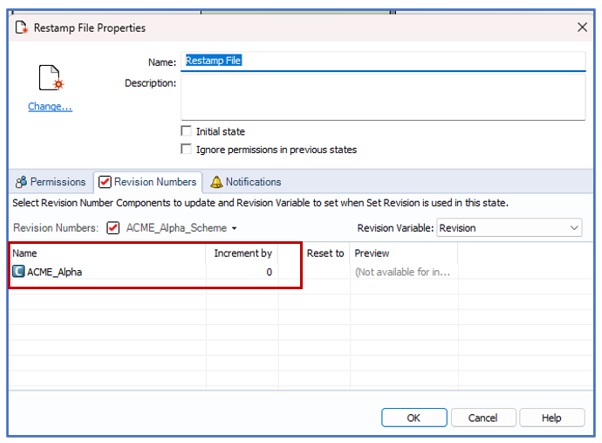
- Restamp File state – Setup the state as follows, but make sure the revision scheme and components chosen are identical to the ones in the “Approved” or “Released” state. Particularly notice that the “Increment By” value is set to zero (0).
- Return transition - Set the “Automatic” item in the dropdown control. Consider adding a convert task action through the transition for the purpose of updating the file in the output folder.
- Workflow link – Workflow link returns file to the “Approved” or “Released” state without bumping the revision.
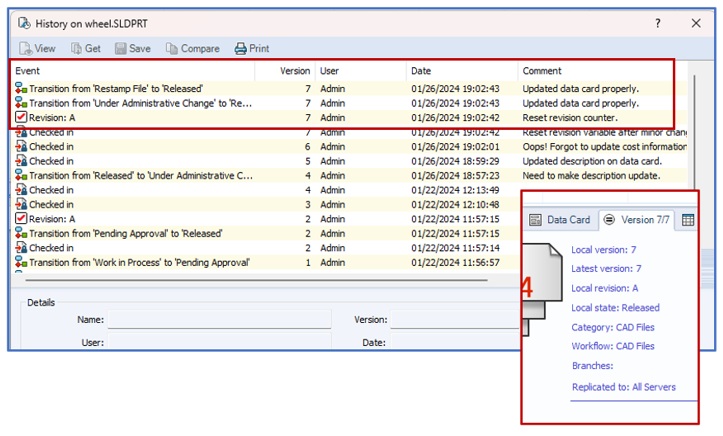
Working Example
Please refer to figure below. Notice the history on the sample part file reflects the changes made to the workflow. Focus especially on version 7 where the file is stamped with the proper revision. Furthermore, the version tab does not appear with “No Revision” for local revision.
Conclusion
This article was written chiefly to learn about what an administrative loop is for and how to properly configure one in SOLIDWORKS PDM. Previously mentioned, this is a longer explanation to show the details for formatting an admin loop. Part 2 (coming soon) will outline a much simpler format. Overall, the goal is to understand how to create an administrative workflow loop while leveraging workflow links, alternative system properties, and unconventional revision counter configurations.