Summary
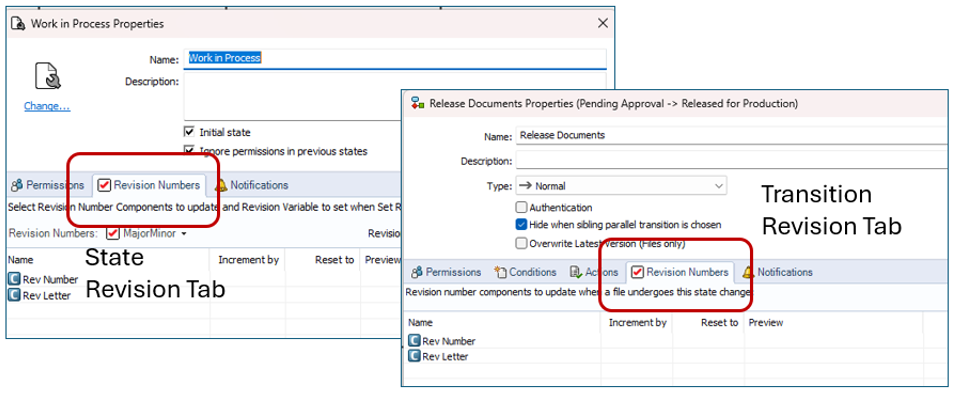
SOLIDWORKS PDM has workflow state and transition Revision Numbers tabs. See figure A below. The state “Revision Numbers” tab is most often used and is the only one taught in the associated course by CADimensions. The transition “Revision Numbers” tab, on the other hand, is purposely overlooked. You’ll notice in the figure both tabs look identical; therefore, they must work the same, right? The answer is “Yes” and “No”. For this reason, they can be confused and produce unwanted results if not used carefully. The details herein hope to clarify the purpose of each feature.
Definitions
Revision - To the user/engineer, a revision is a stamp on a drawing that uniquely identifies the stage of a design process and/or the scope of the drawing changes. SOLIDWORKS PDM, on the other hand, simply recognizes a revision as a counter. Each revision value is associated with a numerical counter value on the backend. Keep this in mind as you continue reading this blog.
Workflow State - Refer to Figure B below. A workflow state is recognized as a block on the flow diagram. Each state represents a point or stage of the document process that controls what can be done with that document and by who.
Workflow Transition - Refer to Figure B below. A transition is identifiable as an arrow on the workflow. Each transition enables the user to get from one state to the next. When a person chooses to change state in SOLIDWORKS PDM, the names of the transitions are shown as options.

Revision Configuration
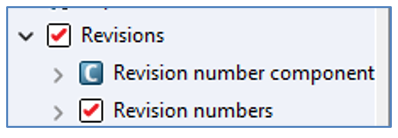
SOLIDWORKS PDM revisions are designed in two parts: revision number components and revision numbers. See Figure C below. Revision number components are the individual counters that represent things like prototype released, production released, build number, etcetera. Revision numbers are schemes and contain components. An example of a common two-part revision scheme could be something like “A.01”. The letter “A” or alpha component is one counter. The “01” or numerical component is another counter. The “.” (dot) character is the delimiter. Both revision components are totally independent and incremented separately.
Traditional Revision Increment Setup
Refer to Figure D below. Start with a workflow state.
- Choose the workflow state for revision control. [1.]
- Select the “Revision Numbers” tab. [2.]
- Choose the “Revision Number” to increment. [3.]
- Define the incremental value for each of the Revision Number Components. The value is typically set to one (1). [4.]
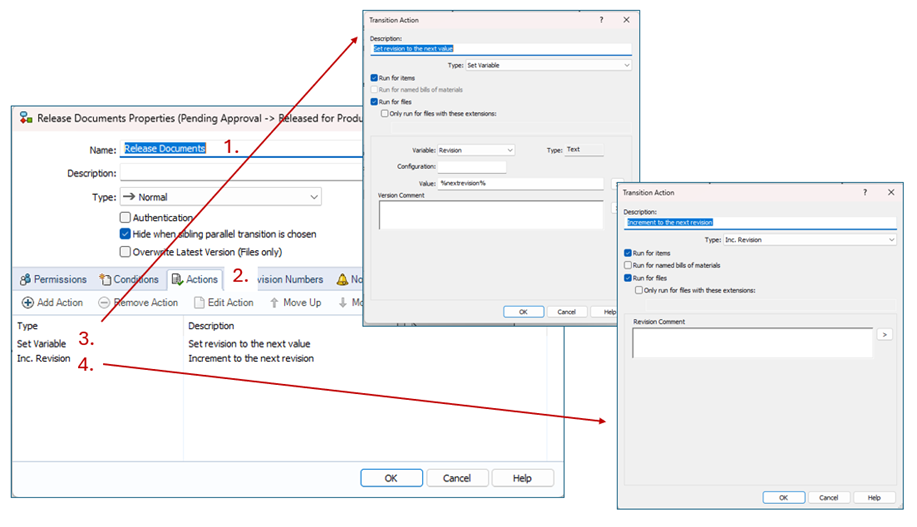
Configure the transition going to the state identified in Step 1 outlined above.
Refer to Figure E below.
- Double-click on the selected transition to open the properties dialog. [1.]
- Go to the “Action” tab. [2.]
- Click the “Add Action” button.
- Set action type to “Set Variable” and configure according to the image below. [3.]
- Click “OK”.
- Click the “Add Action” button.
- Set action type to “Inc. Revision” and setup per the figure below. [4.]
- Click “OK”.
How do I use the Revision Numbers tab to perform the same action?
The revision tab located within the transition properties performs the same routine, but with a slight twist. Firstly, SOLIDWORKS describes the function as follows:
“Values entered on the Revision Numbers tab silently increase or reset the next component counter value as the file pass through the transition, but revision numbers are not set on any files. Setting the revision number is done manually or automatically using the transition action to increase the user-defined revision. Only use this option when working with revision numbers with multiple counter components.”
SOLIDWORKS does offer another better suggestion for when to use the Revision Numbers tab:
“Use the Revision Numbers tab to specify how revision number components defined for the source state increment or reset as files pass through this workflow transition.”
The Revision Numbers tab for the transition is basically a mechanism for predefining the counter value before incrementing it. The original structure outlined above has the revision counter bumping after setting the value on the data card and calling the “Inc. Revision” function. In other words, the transition triggers the routine but the state after it is required to define which revision number to use and what counters to increment. On the other hand, the Revision Numbers tab for transitions can define what revision components are updated well before calling “Inc. Revision” and writing the value to the data card using “Set Variable”.
Two Use Cases
Example One: Description
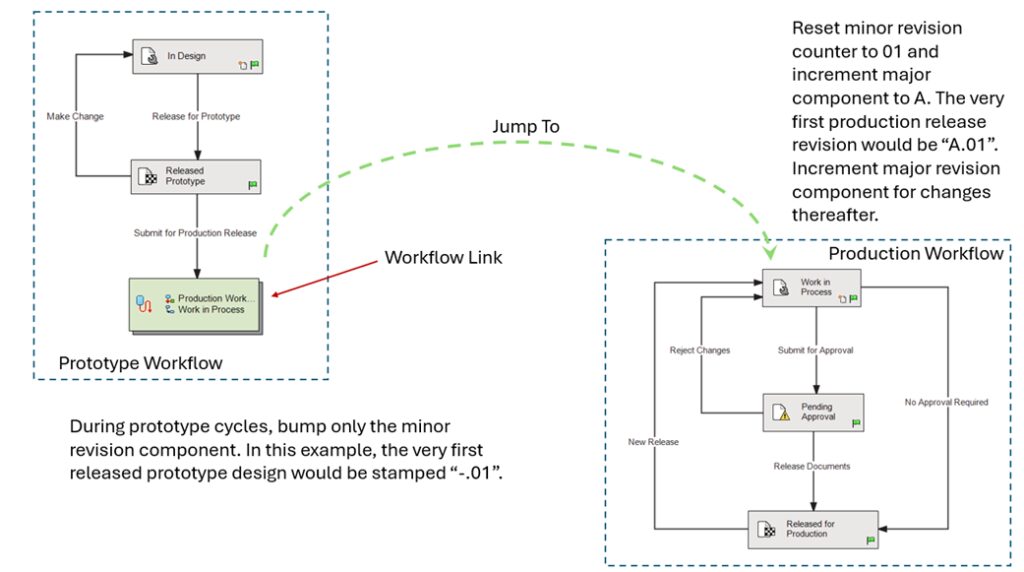
The manufacturer has a prototype and production process for their CAD drawings. See Figure F below. The revision number has two components: an alpha major and a numeric minor. The minor revision component/counter only increments during a prototype phase of production. Once the file transitions from the prototype workflow to the production one, then the secondary/minor value resets to the first value in the numeric sequence and only the primary/major component increments upon changes delivered for production.
Example One: Setup procedure
1. Setup the revision scheme per Figure G shown below. Please note that the numeric revision component could have easily used the predefined sequence with Format String setting. The image below is for visualization purpose.

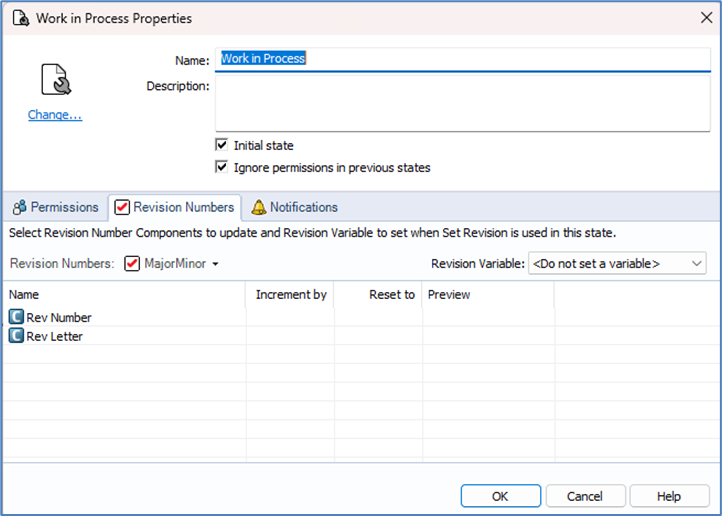
2. Open the properties for the “Work in Process” state.
3. Configure the state as shown in Figure H below. Notice the “Increment by” and “Reset to” elements are empty for both “Rev Number” and “Rev Letter”. The selected revision scheme is named “MajorMinor”.
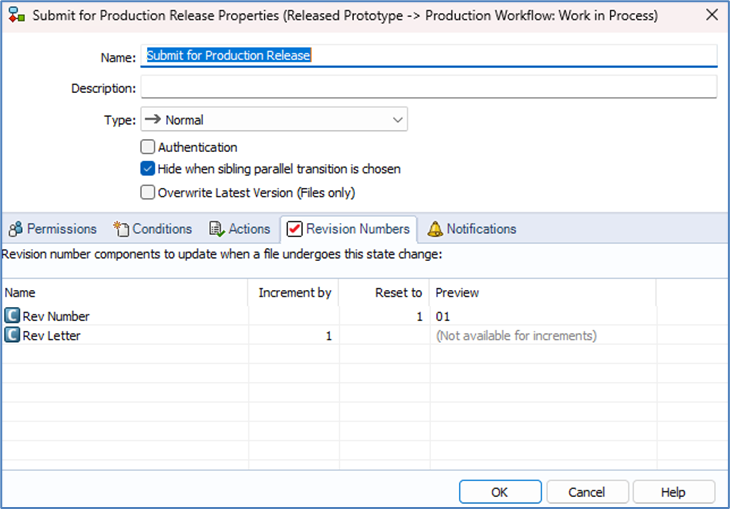
4. Return to the “Prototype Workflow” and set up the options for “Submit for Production Release” transition.
5. Go to the “Revision Numbers” tab and apply the values as shown in Figure I for “Increment By” and “Reset to”. Set both “Increment by” and “Reset to” for the corresponding revision component as shown. Remember, the manufacturer resets the counter for the minor revision but must bump the major revision by 1 if going from the “Prototype Workflow” to the “Production Workflow”. The revision doesn’t officially increment until the file goes to “Released for Production” state.
6. Switch to the “Production Workflow”.
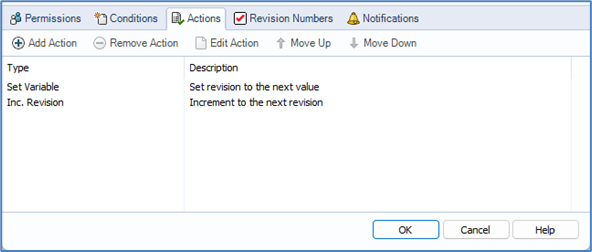
7. Open the “Release Documents” transition and go to the “Actions” tab.
8. Prepare actions as shown in Figure J below.
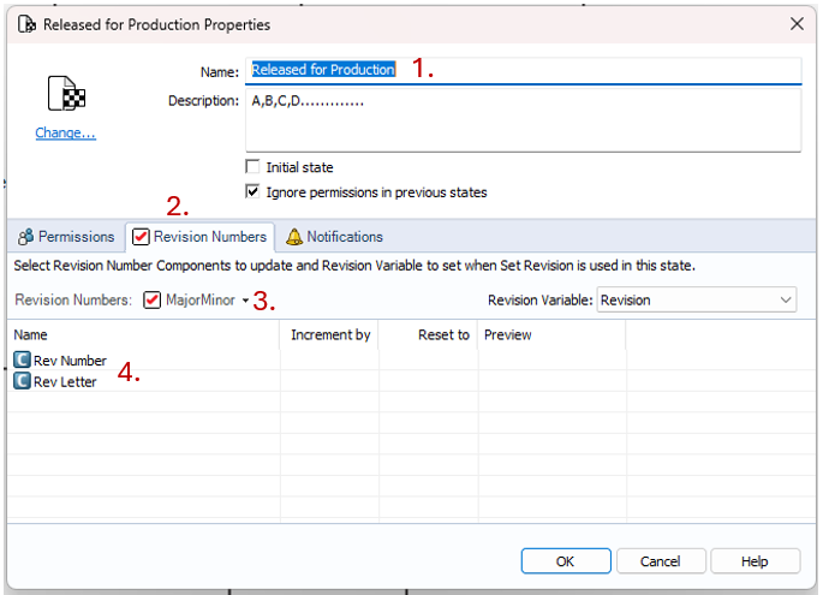
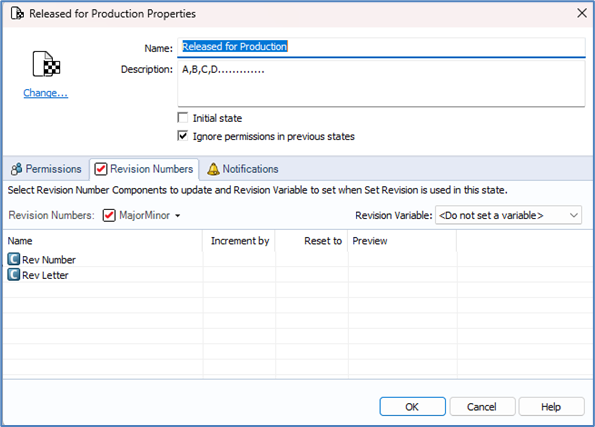
9. IMPORTANT – Must assign the revision scheme to the “Released for Production” state under the “Revision Numbers” tab, but don’t input values for “Rev Number” and “Rev Letter”. See Figure K below.
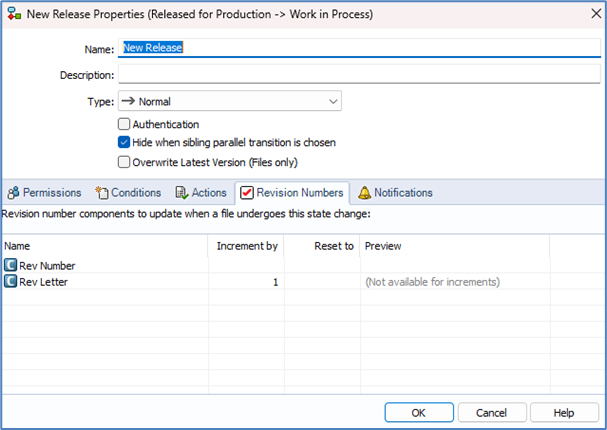
10. Lastly, open the properties for the “New Release” transition. The goal here is to architect the revision to increment the primary value upon releasing the file to the manufacturing team. Hence expand the “Revision Numbers” tab and increment the “Rev Letter” by one (1). See Figure L below.
Example two: Description
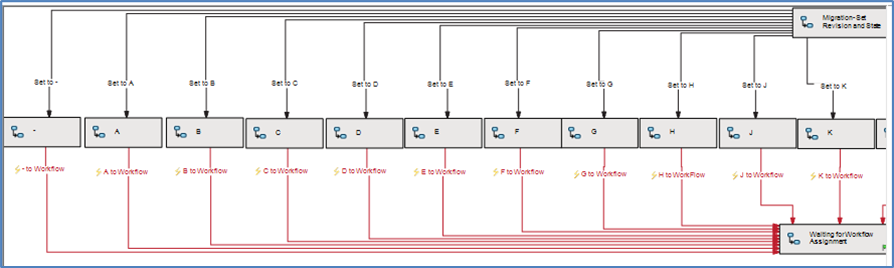
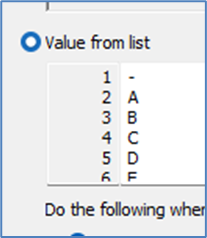
SOLIDWORKS added a feature called “Set Revision” years ago to SOLIDWORKS PDM. The “Set Revision” command enables the user to manually set the counter for the revision. Customers can choose to manually bump the revision using “Set Revision” rather than automate the process using the workflow functionality. The leading purpose of this tool is to preset the counter after migrating files into SOLIDWORKS PDM. For example, the counter value is 4 if the revision series looks like Figure L below and is revision ‘C’. The system will properly increment the value to ‘D’ if using the workflow for revision management.
CADimensions long ago developed a workflow solution to manually set the counter in SOLIDWORKS PDM during migration and aptly named it “Set Initial Revision”. The workflow was the precursor to the SOLIDWORKS PDM “Set Revision” tool. The foundation of the “Set Initial Revision” workflow heavily utilized the “Revision Number” setup on the transitions. Here is a small glimpse of what the “Set Initial Revision” workflow looks like. Same principles apply here as described in Example One.